OneConnect Deployment and Configuration
One Connect Platform: Kubernetes Azure Deployment Manual for Private
Network
Prerequisites
Before you begin, ensure the following requirements are met:
The database has been deployed (refer to the following manual: Establishment of the Database and Requirements)
You have access to the Kubernetes cluster where the system will be deployed.
You have downloaded the deployment package: OneConnect Kubernetes
A bash shell available to run the script.
You have the necessary permissions to execute scripts in the deployment environment.
The terminal where the script is executed must have Docker installed in order for the deployment to function correctly.
Installation Steps
1. Extract the Deployment Archive
First, extract the contents of the .zip file in the data and control panel in Kubernetes:
Navigate to the extracted directory:
2. Configure the .env file
Open the oneconnect.env file using the "nano" command (i.e. nano oneconnect.env) and update the environment variables according to your deployment needs.
Configuration of Environment Variables for Kubernetes
- Tolerations specify the conditions under which pods can be scheduled on nodes with specific taints.
- Each toleration is configured using a set of variables that define KEY, OPERATOR, VALUE, and EFFECT.
- Up to 10 optional toleration blocks can be defined
- Controls scheduling preferences based on node labels (nodeAffinity).
- Activate with ENABLE_NODE_AFFINITY=true. Configure the following variables as needed:
- Affinity types:
required(requiredDuringSchedulingIgnoredDuringExecution) orpreferred(preferredDuringSchedulingIgnoredDuringExecution). - Set using:
NODE_AFFINITY_EXPR_TYPE=matchExpressions
NODE_AFFINITY_KEY=exampleKey
NODE_AFFINITY_OPERATOR=In
NODE_AFFINITY_REQUIRED_VALUES=exampleValue1,exampleValue2
NODE_AFFINITY_PREFERRED_VALUES=exampleValue1,exampleValue2
- Specifies whether pods should run close to other pods based on labels (podAffinity).
- Activate with
ENABLE_POD_AFFINITY=true. Configure as necessary:
POD_AFFINITY_TYPE=required
POD_AFFINITY_EXPR_TYPE=matchExpressions
POD_AFFINITY_KEY=exampleKey
POD_AFFINITY_OPERATOR=In
POD_AFFINITY_REQUIRED_VALUE=exampleValue
POD_AFFINITY_PREFERRED_VALUE=exampleValue
POD_AFFINITY_TOPOLOGY_KEY=topology.kubernetes.io/zone
- Specifies whether pods should avoid running on the same zone or node as other pods based on labels (podAntiAffinity).
- Activate with
ENABLE_POD_ANTI_AFFINITY=trueand configure similar to the podAffinity block:
POD_ANTI_AFFINITY_TYPE=preferred
POD_ANTI_AFFINITY_EXPR_TYPE=matchExpressions
POD_ANTI_AFFINITY_KEY=exampleKey
POD_ANTI_AFFINITY_OPERATOR=In
POD_ANTI_AFFINITY_REQUIRED_VALUE=exampleValue
POD_ANTI_AFFINITY_PREFERRED_VALUE=exampleValue
POD_ANTI_AFFINITY_TOPOLOGY_KEY=kubernetes.io/hostname- Docker image versions for services are managed with the following variables
export APIGATEWAY_VERSION=:v0.0.6
export AUTH_VERSION=:v0.0.6
export BUILDER_VERSION=:v0.3.20
export CWCBACK_VERSION=:v0.0.2
export DATASYNCHUB_VERSION=:v0.0.12
export EMAILBUILDER_VERSION=:v0.0.1
export FRONTEND_VERSION=:v2.3.7
export LOGS_VERSION=:v0.0.1
export METRICS_VERSION=:v0.1.13
export PRODUCER_VERSION=v0.0.1
export CONSUMER_VERSION=v0.0.12
Note: Do not modify these versions unless strictly necessary.
DOCKERHUB_TOKEN variable will be provided by the Onibex Sales team. Make sure to request it in advance, as it is required to download the Docker images before starting the deployment.3. Run the setup.sh Script
- chmod +x generate-deployments.sh
- chmod +x setup.sh
- ./generate-deployments.sh
- ./setup.sh
sudo apt-get install dos2unix
sudo yum install dos2unix
dos2unix setup.sh
dos2unixoneconnect.env
dos2unix generate-deployments.sh./setup.sh
4. Viewing and Using External IP
internal-frontend will appear in your system (make sure to check "Services"). In this row, an additional IP address will be displayed in the "External IP" column, next to the internal IP. This external IP should be used to access the portal on port 5050.Welcome to OneConnect Cloud!
Your new OneConnect Cloud access portal in Azure, available on port 5050, is ready for use.
Example IP:http://00.00.000:5050
OneConnect Configuration Manual
Add a new user to the OneConnect Cloud Platform
Only administrator users with the appropriate permissions can add new users to the OneConnect platform.
- First name
- Last name
- Email
- Phone number
- Company
- Country
Click ACCEPT on the top right side of the screen to activate the new user.
Creating SAP Connectors on the OneConnect Cloud Platform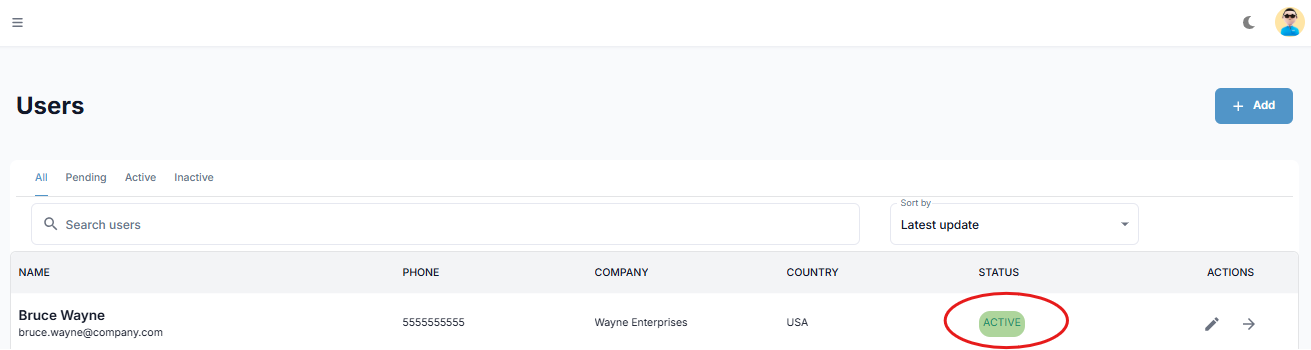
SAP Connector Name (Topic Prefix): This is the name used to identify the connector and will also serve as the prefix for every topic sent through it.
SAP Environment: Specify the SAP environment to which this connector will be added.
SAP Connector Username: Assign a username that will be used in the SAP RFC configuration.
SAP Connector Password: Assign a password for the previously created user; this password will be used in the SAP RFC configuration.
Be sure to save the username and password information, as these cannot be changed later. Neither you nor the Onibex team will be able to access the password once it has been created.
There is an option to download the password in .txt format — we strongly recommend doing so to ensure you have a secure copy.
In the Connection Details section, select the deployment type: Confluent Cloud or Confluent Platform.
If you select Confluent Cloud, enter the following information:
Bootstrap Server number
Schema Registry URL
API Key and API Secret
Schema Registry Key and Schema Registry Secret
If you select Confluent Platform, enter the following information:
- Security protocol: select between "Without security", "Plain Text" or "SASL_SSL"
Bootstrap Server number
Schema Registry URL
API Key and API Secret - only in "Plain Text" or "SASL_SSL"
Schema Registry Key and Schema Registry Secret - only in "Plain Text" or "SASL_SSL"
Next, in the Topic Settings section, enter the required information and click Next.
The system will automatically populate some default values, which can be modified as needed. These include:
-
Number of partitions
-
Number of replicas
-
Retention period (in days)
Request CPU
-
Request Memory
-
Limit CPU
-
Limit Memory
To access your new SAP Connector, click on the username or the action button, then navigate to the "SAP Connectors" section.
You will now see a list with your new connector. To access it, click the "GO" button.
Related Articles
Establishment of the Database and Requirements
One Connect Manual in Azure Establishment of the Database and Requirements Prerequisites For the SQL database, the following are recommended: MariaDB MySQL Download the following sql.zip file - Database Deployment Minimum Resource Requirements ...One Connect Cloud Deployment
Prerequisites Download the required .zip folders attached at the end of the document: sql.zip one-connect.zip kafka-compose.zip Requirements for the Virtual Machine System: Linux Architecture: 64-bit processors (x86_64) support Instance ...EKS Deployment Manual with Terraform
This manual provides step-by-step instructions for deploying an Amazon EKS (Elastic Kubernetes Service) cluster using Terraform. It includes the configuration of essential components such as AWS credentials, infrastructure provisioning, EBS CSI ...One Connect Deployment - Azure Prerequisites
Before you Begin: The following deployment manuals assumes a basic understanding of Kubernetes concepts. For more information, refer to Kubernetes core concepts for Azure Kubernetes Service (AKS). Before you begin: If you don't have an Azure account, ...One Connect Deployment - AWS Prerequisites
Technical Prerequisites for Proof of Concept (PoC) Kubernetes Deployment Options The OneConnect Platform can be deployed on Minikube or vanilla Kubernetes clusters. However, for better scalability and operational simplicity, we recommend using Amazon ...